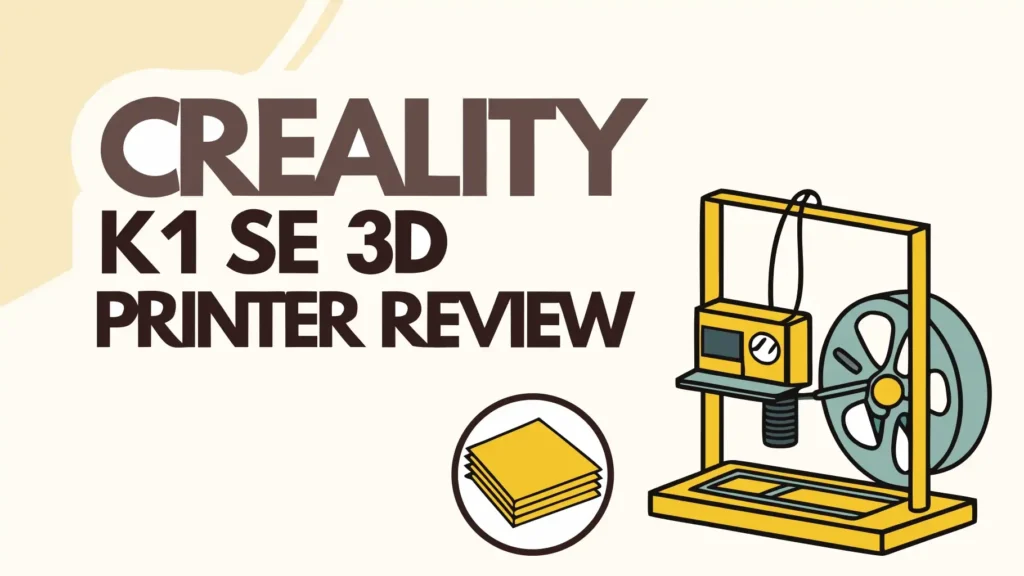
Creality K1 SE 3D Printer Review: Worth Your Money?
The world of 3D printing has changed dramatically over the past few years. What once required hours of manual calibration and technical expertise now comes ready to print right out of the box. The Creality K1 SE 3D Printer stands as a perfect example of this evolution.
If you have been searching for a 3D printer that combines blazing fast print speeds, hands free auto leveling, and user friendly operation, the K1 SE deserves your attention.
But does it live up to the hype? Let me walk you through everything you need to know about this impressive machine.
Key Takeaways
- Lightning Fast Printing Speed: The K1 SE achieves print speeds up to 600mm/s with 20,000mm/s² acceleration, making it one of the fastest budget friendly 3D printers available today. You can print a standard Benchy test model in just 15 minutes instead of the usual 2 hours.
- True Hands Free Auto Leveling: Unlike many printers that require manual bed leveling adjustments, the K1 SE features a strain gauge sensor system that automatically calibrates the print bed before every print. This means you get perfect first layers every single time without touching a single knob.
- Pre Assembled and Ready to Use: The printer arrives 95% assembled right out of the box. Most users report being ready to print their first model in under 30 minutes after unboxing, making it ideal for beginners who want to start printing immediately.
- CoreXY Architecture for Precision: The lightweight CoreXY motion system keeps the print head moving quickly while maintaining accuracy. This design reduces vibrations and ghosting effects that plague slower printers, resulting in cleaner prints even at high speeds.
- Wide Filament Compatibility: The K1 SE works with virtually every common filament type including PLA, PETG, ABS, TPU, ASA, PC, and even carbon fiber reinforced materials. The enclosed design helps maintain consistent temperatures for materials that require heated chambers.
- Generous Build Volume: With a print size of 220x220x250mm, you have plenty of space for most projects. This is larger than many competitors in the same price range, giving you more creative freedom for bigger models.
Creality K1 SE 3D Printer

- 【500mm/s High-Speed Fast Printing】Driven by a lightweight CoreXY motion system, the...
- 【Solid Metal Build—High Precision & Stable Printing】Featuring a die-cast aluminum...
Unboxing Experience and First Impressions
When you first open the box of your K1 SE, you will immediately notice how solid and well built this printer feels. The all metal CoreXY frame gives the machine a sturdy foundation that minimizes wobbling during high speed prints. Everything arrives neatly packaged with foam protection ensuring no damage during shipping.
The printer comes mostly assembled which is a huge relief for anyone new to 3D printing. You only need to attach a few components like the spool holder and connect some cables. The included instruction manual provides clear step by step guidance with photos showing exactly what goes where. Even complete beginners can have this machine assembled and running within half an hour.
One thing that impressed me right away was the build quality of the print bed. The flexible PEI coated steel sheet makes removing finished prints incredibly easy. You simply wait for the bed to cool down a bit, flex the sheet slightly, and your print pops right off. No more struggling with spatulas or risking damage to your prints.
The 4.3 inch color touchscreen feels responsive and intuitive. The menu system makes sense even if you have never used a 3D printer before. Everything from loading filament to starting a print can be done through simple taps on this screen.
CoreXY Motion System: The Secret Behind the Speed
What makes the K1 SE so much faster than traditional 3D printers? The answer lies in its CoreXY motion architecture. Unlike conventional printers that move the entire print bed or heavy components, the CoreXY system keeps the print head lightweight and agile.
In this design, two motors work together using a belt system to move the print head along the X and Y axes. This means the motors stay stationary while only the lightweight print head moves. The result is dramatically reduced moving mass which allows for those incredible 600mm/s speeds and 20,000mm/s² acceleration rates.
The benefits of this system extend beyond just speed. Because less mass moves around, you get less ringing and ghosting artifacts on your prints. The printer can change directions quickly without the momentum creating quality issues. This means your prints look cleaner with sharper details even when printing at maximum speed.
The CoreXY setup also contributes to quieter operation. Traditional bed slinger printers create a lot of noise as they throw the heavy bed back and forth. The K1 SE operates much more quietly, making it suitable for home offices or living spaces where you need to keep noise levels down.
Hands Free Auto Leveling: Print Perfection Every Time
One of the biggest frustrations with budget 3D printers has always been bed leveling. Even a tiny deviation can ruin your entire print by causing poor bed adhesion or nozzle crashes. The K1 SE eliminates this headache completely with its intelligent auto leveling system.
The printer uses a strain gauge sensor built into the print head assembly. This sensor measures tiny variations in pressure as the nozzle taps different points on the bed. The printer creates a detailed mesh map of your build surface, accounting for any warping or unevenness. This entire process happens automatically before each print without any user intervention required.
What makes this system even better is the automatic Z offset calibration. The printer not only levels the bed but also determines the perfect distance between nozzle and bed surface. This ensures optimal first layer adhesion without being too squished or too far away. You get consistent results print after print without touching any settings.
The hands free nature of this feature cannot be overstated. Many printers claim to have auto leveling but still require manual adjustments or occasional recalibration. The K1 SE truly lives up to its hands free promise. Users report going months between manual leveling checks, and even then, the automatic system handles everything perfectly.
Top 3 Alternatives for Creality K1 SE
While the K1 SE offers incredible value, you might want to consider these excellent alternatives depending on your specific needs:

- High-Speed Precision: Experience unparalleled speed and precision with the Bambu Lab A1...
- Multi-Color Printing with AMS lite: Unlock your creativity with vibrant and multi-colored...
The Bambu Lab A1 Mini represents the gold standard in ease of use and print quality. This compact printer delivers exceptional results with minimal effort. Its automatic calibration system rivals high end industrial machines. The A1 Mini excels at multicolor printing when paired with the AMS lite system, making it perfect for colorful projects. The 180x180x180mm build volume is smaller than the K1 SE, but the print quality often surpasses it. This printer operates whisper quiet at under 48 decibels. If you prioritize perfect prints over build size, the A1 Mini is your best choice.

- One-Click Automatic Printing: Experience hassle-free 3D printing with the Adventurer 5M...
- 12X Ultra Fast Printing: Featuring a CoreXY structure with 600mm/s travel speed and...
The Flashforge Adventurer 5M competes directly with the K1 SE in both speed and price. It matches the 600mm/s maximum speed and features a similar 220x220x220mm build volume. What sets the 5M apart is its tool free quick swap nozzle system that lets you change nozzles in just 3 seconds. The fully enclosed design works brilliantly for temperature sensitive materials like ABS and ASA. Flashforge’s reputation for reliable customer support and firmware updates makes this a solid alternative. The auto leveling works flawlessly and the CoreXY structure delivers consistent results at high speeds.

- 【250mm/s High-speed Printing】Creality Ender 3 V3 SE 3d printer supports a maximum...
- 【Powerful ""Sprite"" Direct Extruder】Ender 3 V3 SE is the upgrade of ender 3, ender 3...
For those on a tighter budget, the Creality Ender 3 V3 SE offers incredible value under $200. While it cannot match the K1 SE’s speed at 250mm/s maximum, it delivers excellent print quality for the price. The Sprite direct extruder handles flexible filaments better than most budget options. CR Touch auto leveling ensures good first layers without manual adjustments. The dual Z axis design provides stable printing for taller objects. The 220x220x250mm build volume matches the K1 SE, giving you plenty of space for projects. If speed is not your top priority and you want to save money, the V3 SE represents outstanding value.
Print Quality: Does Speed Compromise Detail?
The big question everyone asks about high speed printers is whether they sacrifice quality for speed. With the K1 SE, the answer is surprisingly positive. While printing at maximum 600mm/s does show some quality trade offs, the results at more reasonable speeds of 300 to 400mm/s remain excellent.
The input shaping technology plays a crucial role here. This feature uses accelerometers to measure printer vibrations and compensates for them in real time. The result is reduced ringing and ghosting even at high speeds. Your prints come out with clean surfaces and sharp corners that would be impossible on older high speed designs.
Layer adhesion proves consistently strong across different filament types. The direct drive extruder with its quick swap tri metal nozzle provides reliable filament feeding. The all metal hot end reaches temperatures up to 300°C, handling even engineering grade materials without problems. The heated bed goes up to 100°C, providing excellent adhesion for materials like ABS and PETG.
Detail reproduction impresses for a printer in this price range. Fine features like text, small holes, and intricate patterns come out clearly defined. Overhangs up to 45 degrees print reliably without supports. Bridging performance works well for gaps up to 30mm before you start seeing sagging.
The enclosed design helps maintain consistent temperature throughout the print chamber. This reduces warping and layer separation especially with materials sensitive to temperature fluctuations. The quiet fan system provides adequate cooling without creating annoying noise.
User Interface and Software Experience
The K1 SE comes with Creality Print 5 slicing software which has improved dramatically over older versions. The interface feels modern and intuitive with logical menu organization. Beginners can use the simple mode with preset profiles for common materials while advanced users get access to hundreds of detailed settings.
The software includes built in profiles specifically tuned for the K1 SE. These profiles provide an excellent starting point that delivers good results right away. You can print successfully without understanding complex slicing parameters. As you gain experience, you can dive into advanced settings to optimize prints for specific needs.
The 4.3 inch touchscreen on the printer itself handles most operations smoothly. The color display shows clear preview images of your models before printing. You can adjust settings like temperature and fan speed during prints without interrupting them. The menu navigation feels responsive with minimal lag.
Wireless connectivity options include both WiFi and LAN connections. You can upload files directly from your computer or phone without carrying SD cards back and forth. The Creality Cloud integration lets you monitor prints remotely and receive notifications when prints complete or encounter problems.
One minor limitation is the lack of a built in camera for remote monitoring. Some competitors include AI powered cameras that watch for print failures. However, this keeps the K1 SE’s price competitive, and you can always add an external camera if remote monitoring matters to you.
Filament Compatibility and Material Versatility
One of the K1 SE’s strongest features is its impressive filament compatibility. The enclosed design and powerful heated bed handle a wide range of materials without problems. Standard materials like PLA print beautifully with minimal effort. The printer comes with profiles that work perfectly right out of the box.
PETG and other moisture sensitive materials benefit from the enclosed chamber. The consistent temperature prevents warping and layer adhesion problems common with open frame printers. The flexible PEI sheet provides excellent adhesion without requiring glue or tape.
For engineering applications, the K1 SE handles ABS, ASA, and PC impressively well. The 300°C hot end temperature capability means these high temperature materials print reliably. The enclosed chamber helps prevent the warping and cracking that plague these materials on open printers.
Flexible filaments like TPU work surprisingly well thanks to the direct drive extruder. The short distance between drive gear and hot end prevents the filament from buckling. You can print flexible parts like phone cases and gaskets with good results. Keep speeds moderate around 40 to 60mm/s for best results with flexible materials.
The printer even handles carbon fiber reinforced filaments including PLA CF, PETG CF, and PA CF. The hardened steel nozzle option resists wear from abrasive materials. This opens up possibilities for functional parts that need extra strength and rigidity.
Build Volume and Practical Printing Space
The 220x220x250mm build volume provides ample space for most hobbyist and small business needs. This size allows you to print reasonably large functional parts without splitting them into multiple pieces. The vertical height of 250mm proves especially useful for tall vases, containers, or architectural models.
Compared to competitors in the same price range, this build volume sits comfortably in the middle ground. It is larger than compact printers like the Bambu A1 Mini but smaller than full size models like the K1 Max. For most users, this size strikes the perfect balance between capability and desk space requirements.
The actual usable print area matches the advertised dimensions closely. You can print objects that fill the entire bed without running into mechanical limitations. The CoreXY system maintains accuracy even at the extreme corners of the build volume. Prints in the center and edges show consistent quality.
The flexible PEI coated build plate makes excellent use of the available space. Parts stick firmly during printing but release easily when cooled. The magnetic attachment system lets you remove the entire plate for easier part removal. Having a spare plate means you can start the next print immediately while cleaning the used plate.
Assembly and Setup Process
Setting up the K1 SE ranks among the easiest experiences in 3D printing. The printer arrives 95% pre assembled with only a few simple steps needed to get started. The main body, print head, and motion system come fully assembled and tested at the factory.
The setup process involves four main steps that take most people 20 to 30 minutes total. First, you attach the spool holder to the top of the frame using two screws. Second, you connect the power supply cable and plug in the touchscreen ribbon cable. Third, you feed the filament tube through the provided path. Finally, you run the auto leveling sequence through the touchscreen menu.
The included instruction manual provides clear photos for each step. The manual uses simple language avoiding technical jargon that might confuse beginners. Creality also offers video tutorials on their website showing the complete setup process from multiple angles.
One thoughtful touch is the included toolkit with all necessary hex keys and tools. You do not need to dig through your garage finding the right sizes. Everything you need comes in the box ready to use.
The first print calibration happens automatically when you power on the machine. The printer homes all axes, performs bed leveling, and runs through various checks to ensure everything works correctly. This entire process takes about 10 minutes and requires no user input beyond pressing the start button.
Speed Testing: How Fast Does It Really Print?
The advertised 600mm/s maximum speed sounds impressive, but real world printing requires a more nuanced approach. While the printer can physically achieve this speed, practical print speeds depend on your quality expectations and the model geometry.
For draft quality prints where speed matters more than perfection, you can push speeds to 400 to 500mm/s with acceptable results. At these speeds, a standard 3DBenchy test boat prints in approximately 15 to 18 minutes compared to 90 to 120 minutes on traditional printers. The time savings prove enormous for large batch production or rapid prototyping.
For standard quality prints that balance speed and detail, speeds around 250 to 350mm/s work beautifully. At this range, print quality rivals or exceeds what slower printers achieve at their normal speeds. Layer lines remain minimal, corners stay sharp, and surface finish looks smooth. This is the sweet spot where the K1 SE truly shines.
For high detail prints requiring maximum precision, dropping to 150 to 200mm/s delivers exceptional results. Even at these reduced speeds, you still print significantly faster than traditional machines. The quality at this speed range matches what you would expect from printers costing twice as much.
The acceleration rate of 20,000mm/s² means the printer reaches target speeds quickly without long ramping periods. This particularly benefits small detailed parts with lots of direction changes. The printer spends more time at full speed rather than constantly accelerating and decelerating.
Real users report their typical prints complete in one third to one quarter of the time compared to their previous printers. A miniature figure that took 8 hours now finishes in 2 to 3 hours. Large vases that required overnight prints now complete during a workday. These time savings add up quickly if you print frequently.
Maintenance Requirements and Long Term Reliability
The K1 SE requires minimal maintenance compared to many 3D printers. The enclosed design keeps dust and debris away from sensitive components. The CoreXY belt system uses high quality belts that maintain tension well over time. Most users report going months without needing any adjustments.
Regular maintenance involves simple tasks you can complete in minutes. Cleaning the build plate with isopropyl alcohol before each print ensures good adhesion. Checking belt tension every few months takes just seconds. Lubricating the Z axis lead screw once a month keeps vertical motion smooth. These tasks require no special tools or technical knowledge.
The quick swap nozzle system makes nozzle replacement incredibly easy when needed. You simply heat the hot end, unscrew the old nozzle, and screw in the new one. The entire process takes under 5 minutes. This design eliminates the frustration of traditional nozzle changes that could take 30 minutes or more.
Filament path maintenance stays straightforward thanks to the direct drive design. The short distance between extruder and hot end means fewer places for clogs to develop. When clogs do occur, the removal process involves heating the hot end and pulling out the problem filament. A cleaning filament passed through occasionally prevents buildup.
The cooling fan system uses quality fans that run quietly and reliably. The fans use standard sizes making replacement easy and affordable if needed years down the road. The part cooling fan provides adequate airflow for overhangs and bridges without creating excessive noise.
Long term reliability reports look positive from early adopters. Users who have run their K1 SE printers for six months or more report consistent performance without major issues. Print quality remains stable over thousands of printing hours. The solid metal frame shows no signs of loosening or developing play in the motion system.
Noise Levels During Operation
Noise represents an important consideration especially if your printer sits in a living space or office. The K1 SE operates significantly quieter than traditional bed slinger style printers. The CoreXY system eliminates the loud banging sounds created by rapidly moving print beds.
During normal printing, the K1 SE produces noise levels around 50 to 55 decibels. This compares to the sound of a quiet conversation or a refrigerator running. You can easily work at a desk near the printer without significant distraction. The enclosed design helps contain what noise the fans and motors do produce.
The cooling fans generate most of the audible noise. The part cooling fan spins up and down based on print requirements. During sections requiring lots of cooling like overhangs, the fan runs at full speed creating a noticeable whoosh. During solid infill sections, the fan may turn off completely resulting in very quiet operation.
The touchscreen provides options to adjust fan speeds if noise concerns you. Reducing fan speeds by 10 to 20% drops noise noticeably without significantly impacting print quality. This gives you control over the noise versus quality trade off based on your current needs.
At maximum speeds approaching 600mm/s, noise levels increase somewhat as the motors work harder. Even then, the printer remains noticeably quieter than budget printers operating at normal speeds. The enclosed frame dampens vibrations preventing them from resonating through your desk or table.
Value Proposition: Is the K1 SE Worth Your Money?
At its current price point around $240 to $360 depending on sales and bundles, the K1 SE delivers exceptional value. You get performance that matches printers costing $500 or more just a year ago. The combination of speed, auto leveling, and build quality makes this printer a standout in its price range.
The time savings alone justify the investment for many users. If you previously spent hours waiting for prints, cutting that time by 60 to 75% means you can complete more projects or iterate designs much faster. For small businesses doing rapid prototyping or small batch production, the printer pays for itself quickly.
The ease of use matters tremendously for beginners. Many people give up on 3D printing after struggling with manual leveling, poor adhesion, and failed prints. The K1 SE eliminates most of these frustrations right from your first print. This means less wasted filament, less frustration, and more successful projects.
The enclosed design adds value by expanding your material options. Printers requiring separate enclosures cost more overall once you factor in the enclosure purchase. Having this built in from the start saves money and desk space.
Filament compatibility prevents you from feeling locked into specific material choices. As your skills and projects evolve, you can experiment with different materials without needing a printer upgrade. This future proofing extends the useful life of your investment.
The build quality suggests this printer will serve you reliably for years. Cheap printers often develop mechanical issues within months requiring constant fiddling. The K1 SE’s solid construction and quality components mean you spend time printing instead of repairing.
Common Issues and How to Solve Them
While the K1 SE proves reliable overall, understanding potential issues helps you troubleshoot quickly when problems arise. Most issues have simple solutions that get you back to printing within minutes.
First layer adhesion problems occasionally occur especially when switching between filament types. The solution involves cleaning the build plate thoroughly with isopropyl alcohol and a paper towel. Running the auto leveling sequence again ensures the nozzle height remains optimal. For stubborn materials, slightly increasing bed temperature by 5 to 10 degrees helps.
Stringing between parts happens when printing multiple objects or models with lots of travel moves. The fix involves adjusting retraction settings in your slicer. Increasing retraction distance by 0.5mm and retraction speed by 5mm/s usually eliminates most stringing. Enabling the wipe feature helps clean the nozzle during travel moves.
Layer shifting rarely occurs but can ruin long prints when it does. This usually indicates loose belts or motor issues. Check that all belts have proper tension by pressing them gently. They should feel firm with minimal give. Ensure motor cables are securely connected. Running the printer on a stable surface prevents vibrations that might trigger shifts.
Warping corners mainly affect ABS and ASA prints. The solution involves ensuring the chamber stays closed during printing to maintain temperature. Using a brim for the first few layers increases bed contact area. Printing on the smooth side of the PEI sheet improves ABS adhesion. Reducing part cooling fan speed for the first 10 to 15 layers helps.
Clogged nozzles occur less frequently with the K1 SE’s direct drive design but can happen. Performing a cold pull clears most clogs easily. Heat the nozzle to printing temperature, insert cleaning filament, then let it cool to 90°C before pulling firmly. Repeat if needed. For stubborn clogs, removing the nozzle and clearing it with a needle works.
What is auto leveling in 3D printers?
Auto leveling is a feature that automatically measures and compensates for any unevenness in your printer’s build surface. The printer uses sensors to probe multiple points across the bed, creating a digital map of the surface. During printing, the software adjusts the Z axis height continuously to maintain the perfect distance between nozzle and bed. This ensures good first layer adhesion across the entire build surface without manual adjustment.
How long does the K1 SE take to complete a print?
Print time depends entirely on the size and complexity of your model plus the speed settings you choose. A small keychain might take 15 to 30 minutes. A standard 3DBenchy test boat completes in 15 to 20 minutes at high speed or 25 to 35 minutes at quality focused speeds. Large models like a full size helmet could take 8 to 15 hours. The K1 SE prints 3 to 4 times faster than traditional printers for the same models.
Can beginners use the Creality K1 SE successfully?
Absolutely yes. The K1 SE ranks among the most beginner friendly printers available today. The pre assembled design means no complex setup procedures. The automatic leveling eliminates the biggest frustration beginners face. The included filament profiles work excellently right from your first print. The touchscreen interface uses simple menus anyone can understand. Most beginners successfully print their first model within an hour of unboxing.
Does the K1 SE require an enclosure for ABS printing?
No external enclosure is needed because the K1 SE comes with a built in enclosure. The closed frame design maintains consistent chamber temperatures perfect for ABS, ASA, and other temperature sensitive materials. This built in enclosure saves you money and desk space compared to buying a separate enclosure for open frame printers.
What maintenance does the K1 SE need?
Regular maintenance stays minimal and simple. Clean the build plate with isopropyl alcohol before each print. Check belt tension monthly by pressing them gently. Lubricate the Z axis lead screw once a month with a drop of machine oil. Clean the nozzle exterior occasionally with a brass brush while hot. Replace the nozzle every 6 to 12 months depending on usage. These simple tasks take just minutes and keep your printer running smoothly.
Can the K1 SE print flexible filaments like TPU?
Yes, the direct drive extruder handles flexible filaments quite well. TPU and other flexible materials print successfully when you reduce speeds to 40 to 60mm/s. The short distance between the drive gear and hot end prevents the filament from buckling. You may need to adjust retraction settings, but overall the K1 SE manages flexible materials better than many printers with Bowden style extruders.
How does the K1 SE compare to the original K1?
The K1 SE represents a value focused version of the original K1. It shares the same CoreXY architecture, speed capabilities, and build volume. The main differences include the K1 SE lacking the AI camera and having slightly simpler electronics. For most users, these differences matter little since the core printing performance remains virtually identical. The K1 SE offers better value for money if you do not need remote monitoring features.
What file formats does the K1 SE accept?
The K1 SE works with standard G code files generated by any slicing software. The included Creality Print software accepts STL, OBJ, and 3MF model files which it converts to G code. You can also use popular alternatives like Cura, PrusaSlicer, or Simplify3D. The printer reads files from the SD card, USB drive, or through WiFi connection using standard G code format.
Is the K1 SE suitable for professional use?
For certain professional applications, yes absolutely. Small businesses doing rapid prototyping, architectural models, or small batch production find the K1 SE excellent. The fast print speeds increase productivity significantly. The reliable auto leveling reduces failed prints and wasted materials. However, for high volume manufacturing or applications requiring extreme precision, you might need more expensive industrial equipment. For small to medium professional needs, the K1 SE performs admirably.
Last update on 2026-04-11 / Affiliate links / Images from Amazon Product Advertising API